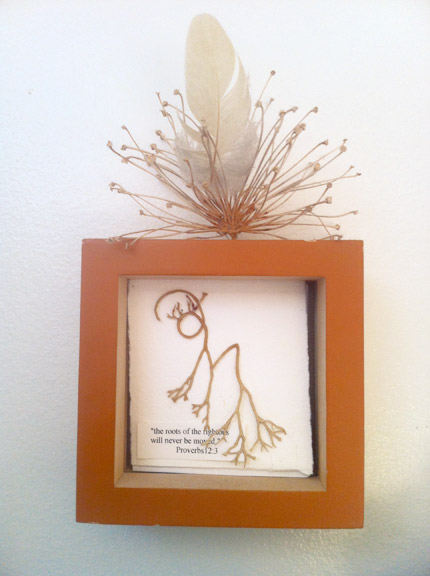
I have this desire to add top decorations to the art, prints, collages etc. that I have framed on my walls. Once I have framed and hung a picture, I realize I have this mini shelf all ready for a touch of whimsy. The fun part is that this is nothing hurried or too intentional. I will simply have gathered something from the garden or the sea or maybe something from my little piles of vintage collections. If the color and or texture match and maybe even the subject matter match, I’ll balance or tuck it on top and see if it works.
Here I have framed a little collage I made from seaweed that I collected on the beach. While the seaweed was still wet and pliable I formed and glued several pieces into an M for my own distinctive monogram.
For my top decoration, I added a dried flower head from garlic chives and a feather, both from my back yard. It’s a color and texture match and I enjoy it everyday as I cook and work in the kitchen.
[sugar_slider id=”36″]
This last August, Kathy and Jannie, my roommates from college came to spend a week with me at my beach house. It was such a sweet time; so easy going with all three of us pitching in and playing and cooking together – just like we used to do. It was as if the years had melted away and we were back in our little apartment in the Sonata in Lincoln, Nebraska for our junior year of college.
Jannie brought the picture of the three of us that I have included. It was taken on my 22nd birthday. The rest of the pictures are from our recent holiday.
Many years have passed but our friendship and love have remained the same.
[sugar_slider id=”34″]
The color I chose for the packaging of my new jewelry line is inspired by orange coral from the sea. I matched the color to a coral necklace that I have had for over 30 years. This necklace is wrapped around a sea urchin in one of the photo images I have included.
I used this rich coral color on the inside and bottom of the jewelry box. The white lid displays our logo on the top.
I am having so much fun designing the displays for my jewelry line. I have used the coral color from the package to paint a wooden artist’s hand to hold a necklace. These display hands are available to the stores that sell my jewelry.
The last image I included is a sea star I photographed in a tide pool at the beach last month. This solitary star was in a small depression on the Neskowin beach. It seemed to affirm my choice of color for the jewelry boxes.
[sugar_slider id=”31″]
Chartreuse is one of my favorite colors for the garden. I love chartreuse foliage as well chartreuse blooms like Lady’s Mantle and lime green Nicotiana. This is a great color for white gardens as well as full color gardens.
Because these plants are plentiful in my garden, I chose to paint the garden furniture at the beach chartreuse. I actually bought this furniture at K-Mart – a great Martha Stewart design. They were originally a natural wood finish and I had them painted to give them some pizzazz!
[sugar_slider id=”30″]
I had these contemporary shadow boxes made so I could arrange 3-dimensional sea collages on the wall at the beach house.
The beauty of these stacks of shells, found objects, and vintage pieces is that two or more of them simply stacked together in a shadow box make unique and delightful wall art!
These are the objects I used in my four collages:
- A vintage wooden egg crowns a sea urchin.
- A baby nautilus shell balances on a sea star with another tiny sea star on the back surface.
- Another sea star base, this time with a sea urchin, then a shell and finally a green vintage marble to top it all off.
- On an antique wooden stand, a polished stone from the beach is nestled into a shell.
HOW TO MAKE YOUR OWN 3-D COLLAGE FOR THE WALL
- Use a purchased shadow box, a custom-made shadow box or simply a small wooden box (new or vintage) and just start playing around with some beautiful natural forms and perhaps add a fun vintage item.
- Use museum wax, candle wax or some other type of soft wax made for temporary attachments to hold the stacks together. I also used wax to attach the little sea star on the back wall of one of the arrangements.
- Hang your wall art on the wall in just the right place and enjoy it!
 17 February 2012


